5 Tips for Choosing Multi Adapter Wiper Blades
Choosing a replacement wiper blade seems simple until the old connector does not match the new one. Multi Adapterwiper blades include fittings for several arm styles, but “multi-fit” does not guarantee a secure fit on every vehicle. Check your vehicle manual and the blade maker’s fit guide before buying. Fit comes first. That small step can help prevent a loose blade, uneven pressure, or a noisy sweep across the glass. Length matters too. A blade that is too long may touch trim or the other blade, while a short one can leave a broad wet strip in your view. Measure carefully.
The five tips in this guide cover practical checks: connector compatibility, correct blade length, construction, installation, and performance after fitting. Inspect the adapter itself, not only its product photo. Its tabs should lock without force, and the blade should sit straight against the arm. A click helps. It is not proof. After installation, test the wipers with washer fluid and listen for chatter, missed areas, or lifting at the edges. These signs may point to a fitting issue, though glass condition and arm tension matter too. A blade may look right on the shelf and still behave poorly in rain. That detail is easy to overlook. Use these checks as a guide, then verify the result on your own vehicle.
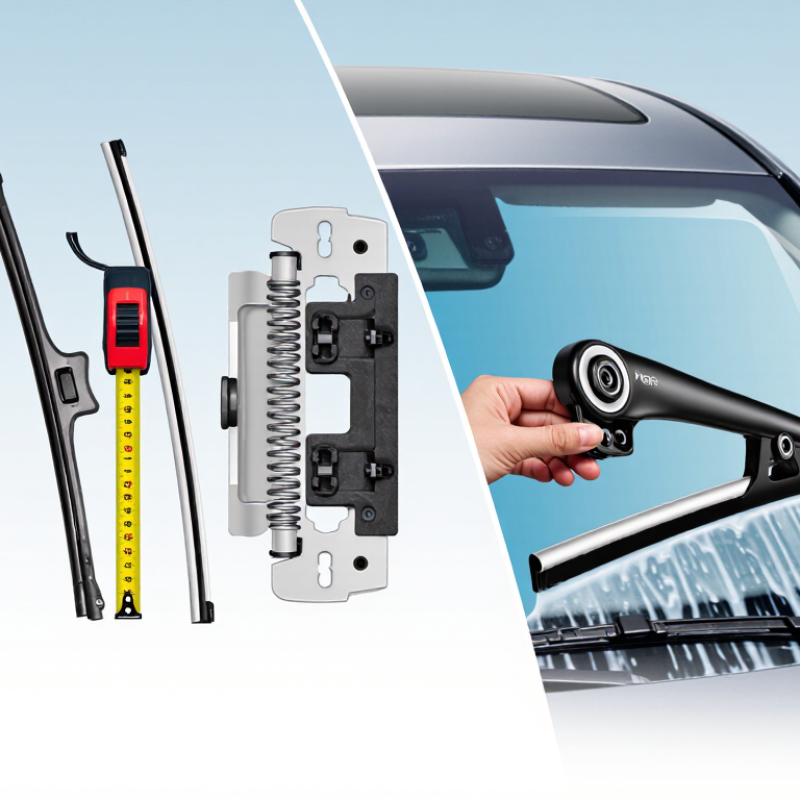
Identify Your Vehicle’s Wiper Arm Type and Connector
Before buying a multi-adapter wiper blade, identify the wiper arm on your vehicle. Check both driver and passenger sides; they may not always match. Common fittings include J-hooks, side pins, bayonet arms, and top-lock connectors. Looks can deceive. A small latch or cover may hide the actual attachment point.
Lift the arm gently and inspect where the blade joins it. Compare that shape with your vehicle’s manual or a clear photo of the original connector. If measuring a pin, note its diameter and position, not just its length. Do not guess. Multi-adapter blades include several fittings, but that does not guarantee a fit for every arm. Check the blade’s compatibility details against your vehicle’s year, model, and trim. During installation, use the adapter specified for your arm, and make sure it locks without force. Pause there. A loose connection can let the blade shift across the glass. Give the blade a careful tug before lowering the arm, then test it with washer fluid. I once assumed two similar-looking hooks were identical; the adapter sat crooked. A second look would have saved time.
5 Tips for Choosing Multi Adapter Wiper Blades - Identify Your Vehicle’s Wiper Arm Type and Connector | Tip | Wiper Arm or Connector | How to Identify It | What to Check on a Multi Adapter Blade | Fitment Check |
| 1 | Identify the arm before choosing a blade | Lift the arm carefully and inspect where it connects to the existing blade. Common designs include J-hook, side pin, bayonet, pinch tab, and top lock. | Compare the arm’s shape and locking method with the adapter illustrations or fitting instructions supplied with the blade. | Do not rely on appearance alone. Confirm the connector type in the vehicle owner’s manual or a reliable fitment guide. |
| 2 | J-hook (hook arm) | The end of the arm curves back on itself, forming a hook that slides through the blade connector. | Check that the adapter opening matches the hook’s shape and size, and that the retaining cover or latch closes fully. | After installation, pull the blade gently away from the arm. It should remain securely attached and pivot freely. |
| 3 | Side pin | A short pin protrudes sideways from the wiper arm and engages with a slot or opening in the connector. | Check the pin diameter and position, and make sure the adapter is designed for that side-pin style. Pin dimensions can vary. | Confirm that the pin passes fully through the connector and that the locking feature engages without forcing the parts. |
| 4 | Bayonet, pinch tab, or top lock | A bayonet arm has a flat, straight end; a pinch-tab arm uses a release tab; a top-lock arm attaches through a locking feature on top of the connector. | Match both the connector profile and release mechanism. Similar-looking arms may use different adapter designs. | Follow the blade’s installation instructions. The adapter should lock in place with no loose movement or visible gap. |
| 5 | Blade length and final operation | Check the required length for each position; the driver-side, passenger-side, and rear blades may differ. | Make sure the package lists the correct length and includes the adapter needed for your specific arm. Multi-adapter does not mean universal fit. | Test the wipers with washer fluid. Confirm smooth movement, full windshield contact, and no collision with the trim or the other blade. |
Confirm the Correct Blade Length and Windshield Coverage
5 Tips for Choosing Multi Adapter Wiper Blades
Confirm the Correct Blade Length and Windshield Coverage
A multi adapter blade can fit several arm styles, but the adapter cannot correct the wrong blade length. Check the vehicle manual or a reliable fitment guide for the required size. Driver-side and passenger-side blades are often different lengths. The rear blade may differ too. Small differences matter.
If you are replacing existing blades, measure each one from end to end and compare the results with the specified sizes. Do not assume both front blades match. I still double-check this; a quick glance at the old blades can miss a small size difference. Not quite obvious.
Length is only part of the check. The blade should sweep the intended glass without striking the windshield trim, overlapping another blade, or leaving a broad unwiped area in the driver’s view. Windshield curves can make coverage less obvious while the car is parked. After installation, test the blades with washer fluid and watch a full sweep from inside the vehicle. Listen for contact with the trim. If a blade lifts, skips, or leaves a persistent strip, stop and recheck its size, seating, and adapter connection. A secure click does not guarantee good coverage. A little patience here can prevent a poor view in rain.
Check Adapter Compatibility and Ease of Installation
Multi-adapter wiper blades include fittings for several arm styles, but that does not guarantee a match for every vehicle. Check your owner’s manual or a reliable fitment guide before buying. Then look at the existing wiper arm: common connections include J-hooks, side pins, and bayonet fittings. A clear photo of the connection can help when names in a chart seem confusing. They can be.
Compare the supplied adapters with the arm, not just the old blade. Some old blades use a clip that stays attached to the blade, so inspect the connection closely. Choose the adapter that matches the arm’s shape and locking point. Do not force a part that almost fits; a tight-looking connection can still be insecure. This is an easy detail to overlook. Fitment information can also be incomplete, so double-check the vehicle year and trim when possible.
For installation, park safely and follow the blade maker’s instructions, since release tabs differ. Protect the glass with a folded towel under the raised arm. Slide the correct adapter into place until its lock engages, then give the blade a gentle tug. It should stay attached without wobbling. If it shifts or will not click, remove it and check the orientation rather than pushing harder. Lower the arm carefully; it can spring back and chip the windshield. A little patience beats a rushed fit.
Compare Blade Materials and All-Weather Performance
A multi-adapter wiper blade is only useful when its material suits your climate and driving conditions. Natural-rubber blades often wipe quietly and cost less, but heat, sunlight, and ozone can make the wiping edge stiff or cracked over time. Silicone edges may last longer in some conditions and can leave a water-repellent residue on the glass. Results vary, though. A material label alone cannot predict how a blade will perform on your windshield.
Look closely at construction, too. A conventional frame has exposed joints that can collect wet snow or ice. A beam-style blade has a flexible, covered body that may maintain more even pressure in changing weather. Hybrid designs combine features, but extra components do not guarantee better wiping. Small details matter. Check whether the adapter locks securely, then inspect the rubber edge for gaps or uneven contact. On a rainy day, test the blade at low speed and watch for missed arcs or chatter. A clean windshield helps make that check fair. There is no perfect choice; severe winter buildup can challenge even a well-matched blade.
Evaluate Durability, Maintenance Needs, and Overall Value
Multi-adapter wiper blades can fit several arm styles, but broad compatibility does not guarantee lasting performance. Check that each adapter locks firmly and sits flush against the wiper arm. A loose connection may cause chatter or uneven pressure across the glass. Look for a flexible rubber edge and a frame that resists bending. Small details matter.
Maintenance affects value, too. Wipe the blade edge with a damp cloth when you clean the windshield, and clear away grit before it scratches the glass. Inspect for cracks, stiffness, or missed streaks after heavy sun or freezing weather. Replace the blade when wiping remains poor; a universal schedule may not suit every climate. That part is easy to overlook.
Compare the expected service life with the purchase price, not just the number on the package. A blade with replaceable rubber may cost less over time, but only if refills are easy to find and fit correctly. Also consider installation: an adapter that takes repeated fiddling can turn a quick change into a frustrating one. A small caveat: advertised durability is not a promise, since storage and driving conditions vary. Choose a secure fit and manageable upkeep over extra features you may never use.
5 Tips for Choosing Multi-Adapter Wiper Blades
Evaluate durability, maintenance needs, and overall value before you buy.
Start by confirming that the adapters fit your vehicle’s wiper arms and that the blade length matches the vehicle specification. Then compare connector security, weather-resistant materials, and ease of replacing the blade or adapter. Priority scores are an editorial checklist guide, not laboratory test results or a product ranking.